No product is 100% perfect, and neither is any product in the ACDSee line. But Ultimate 9 seems to me to be a welcome upgrade in my eyes.
Some background on the three major products in the ACDSee line of software that sprung from the original ACDSee viewer Browser that originated in the 1990s. Note that ACDSee sells other products as well. These are not the only products ACDSee offers, however these are the products I most care about.
There are three products in this line, the current versions are:
- ACDSee 19 - This is no longer the basic photo viewer/browser of the early years. It is a full featured media manager and media database application. It not only allows for some pretty sophisticated management of your photos, it also allows for the simple 'touch-up edits people have come to expect with this sort of product. Actually, when I downloaded this product, I was surprised at how sophisticated the 'Edit' tab controls were. For instance, I could even blend the unedited exposure version of a photo with the edited exposure version! I would say, for the jpg shooter who is more of a shoot and post on social media person, but who wants to be able to touch up and crop photos, and then track how they get used, this may be all they need.
- ACDSee Pro 9 - This adds Raw development and a slightly more sophisticated bit mapped editing capability to the manage functions of ACDSee 19. In fact it looks like ACDSee 19 is lifted whole cloth and inserted into Pro 9 I don't see any significant difference between the Manage tab of ACDSee Pro 9 and the Manage tab of ACDSee 19. I won't go into detail on the differences between the two products, ACDSee has a web page that explains the differences. This first part of the article is a summary, but there is FINALLY, X-TRANS support! Finally! The Edit tab has some additional enhancements that most people will want as well. This includes Pixel targeting, trust me you want Pixel Targeting!
- ACDSee Ultimate 9 - Essentially this is ACDSee Pro 9 with the addition of an enhanced Bit mapped editor with layers.
If you see a pattern where each level of software builds on the features of the one that comes before it and then adds features, you would be correct. They all use the same database and the same user interface. Learning one product gives you most of the skills you need to successfully use a different product. You most definitely do NOT have to forget something to upgrade to a different and more sophisticated product.
But let's review ACDSee Ultimate 9. This is the top of the line in this series of software. It costs the most, but it does the most. I have listed below what I consider the major enhancements. some of them are in U9 only, while others are also in ACDSee 19 and ACDSee Pro 9. I won't attempt to tell you which functions are in which product. ACDSee has a web page that does that quite well.
My goal in this article is to give you MY impression of the new features of Ultimate 9. Please do not consider this a formal review, mainly because I haven't spent enough time with the product to render a final judgement (AS I write this, the software was released the day before), and also I don't like final judgements on software since the review is of.a product at a particular point in time.
The reviews rarely change or get updated, but with software upgrades, the software does, often rendering, the review less accurate than at the time of publication, but the reader has no way of knowing how accurate that review remains. I want to avoid that problem as much as possible, so I consider these an independent, third party, set of release notes for the initial release of ACDSee Ultimate 9. If you MUST think of this as a review, think of it as a brief review of functionality.
Below are the major new features that I think most people will be interested in. I will discuss them individually.
X-Trans Support
Well, it's about time! Most current X-Trans users have already selected their raw development software by now. So if ACDSee wants them to consider switching, the quality of the X-Trans conversion must be at least as good as they currently are getting. I can't comment on the quality of the conversion itself, since I shoot m43s. If any X-Trans users want to download a trial version, and let me know their opinions, I would be happy to publish their comments.
Adjustment Layers
This is a major feature upgrade for Ultimate 9. The ability to mask and apply adjustments to layers in Ultimate 9 takes the layering function of Ultimate 8 from a handy convenience feature to a significant workflow tool.
Automated lens corrections (Geometric and CA)
Again, this is really important. It was frustrating to know that my m43s system embedded distortion data into the image but that ACDSee couldn't access that information. And manual correction was fine for gross obvious distortion, but pretty useless for more subtle correction.
It appears that ACDSee is using the Lensfun correction database, so if a particular lens profile offers CA data, then ACDSee will offer CA correction as well. If they are using LensFun, then a simple internet search will yield all sorts of ways to create Lensfun profiles for lenses using tools many people now have. I even found one that uses the open source stitching tool Hugin.
However, what we need from ACDSee is clarification of, will they use a different, more proprietary, process to create new lens profiles and insert them into ACDSee; or will there be a more generic, process created? I'm sure this announcement will come in time, the new release has only been out one day at this point. I suspect they are now waiting for any errors and omissions to pop up so they can fix them ASAP.
Snapshots (Virtual copies)
This does not appear to be an exact one for one replication of Lightroom's Virtual copies where the database stores and displays a thumbnail of the revised image and search and select the Virtual copy as if it were an independant photo. Instead it allows the user to save the Develop tab's, development setting and give it a name without creating a new thumbnail for that setting. The Snapshot defaults to a datetime stamp as a default name, but clearly, more meaningful Snapshot names would be useful to most people. Changing the default name is easy enough, so I urge users to do so.
Is this as useful, overall, as Lightroom Virtual copies? No, it is not, though it is still VERY useful. However I would remind you that ACDSee uses what appears to be a hierarchical database as opposed to Lightroom's Relational database. Hierarchical databases require a different record access methodology than Relational. This alters significantly how the programmers must code their program. Relational databases get their powerful flexibility at a price of speed though. For those who don't like Lr's speed and response time, this may prove a most satisfactory alternative.
Action Recording and Playback
This works only in record mode in the 'Edit' Tab; and in playback mode, in the Manage and Edit tabs. It does not work in the Develop tab at all, though I can see some valid uses for it in the Develop tab, maybe Version 10 or 11 will offer this feature.
Overall it works pretty well, you select 'record', perform an action or a series of actions in the Edit Tab, then you hit "save", give the recorded action a name. After that, you can bring up any photo, or a Batch of photos, in either the "Manage" tab or the "Edit" tab and apply the same actions to all those photos in the order recorded.
Presently, there is no way to edit a recorded action. If you spot an error in the recorded action file, you will need to delete that action file and create an entirely new one. Again, a nice addition for subsequent versions, I guess.
PS Plugin Support
I find this VERY useful, I no longer have to treat Plug-ins as standalone editors or avoid using those plug-ins that can't function as a stand alone editor. So far, I can only confirm that it works with 64 bit plug-ins, so favorite 32 bit Plug-ins might not work.
EDIT 9/30/2015:
In a private conversation with another ACDSee user, he reports that he has successfully run Polaroid Dust and Scratch remover and Kodak ROC inside of ACDSee Ultimate 9. I want to make sure I correct any misconceptions I may have left.
EDIT 9/30/2015:
In a private conversation with another ACDSee user, he reports that he has successfully run Polaroid Dust and Scratch remover and Kodak ROC inside of ACDSee Ultimate 9. I want to make sure I correct any misconceptions I may have left.
Collections/Smart Collections
I haven't played with this function much, but my feeling, so far, is that it will be quite useful. While the user interface differs pretty much from Lightroom's version, the actual concept and process pretty much works the same way. Basically you create and name a collection and then select a group of photos right click on them and add them to the desired collection.
Smart collections seem to have a search function added to them. At this point I haven't really used the Smart Collection feature. If I find it particularly useful or poetentially useful I may write an article specifically on this topic.
Photos Mode
 Allows you to view entire photo database regardless of location on the hard drive or in other logical ACDSee constructs. On the Left of the screen is a narrow window of dates on which photos were taken, And on the right, a much larger window that displays all the photos taken on, or after, that date. So, in effect, you can see your entire collection of managed photos, or a subset of photos that were taken AFTER a specific date.
I'm not sure I will use this much, but I suspect people involved in commercial photo management will find it useful.
Dehaze
Is this a fad for the software publishers or what? It seems every publisher is adding a dehaze slider. What does this do that can't be done with other tools? Well I tested it out, and when compared to other techniques,where no other conditions needed to be met, it is a tiny bit better than I could do on my own.
Skin Tune
I would point you to my comments on Dehaze. Though as a landscape and nature photographer, I don't really use this sort of 'glamour' effect all that often, I have tried it out and I find it acceptable for my limited needs, and I suspect most other people will find it useful as well.
4K support
It's there if you need it. I have no way to test it out.
Lightroom Database conversion
I haven't tested, I got rid of my Lr database some time ago. But I suspect it does NOT Convert your Lr edits, but is more about metadata conversion issues. That in itself, is not small potatoes, and may make it easier for Lightroom users to switch to ACDSee from Lr. I wish I had it 3-4 years ago when I switched from Lr.
Summary
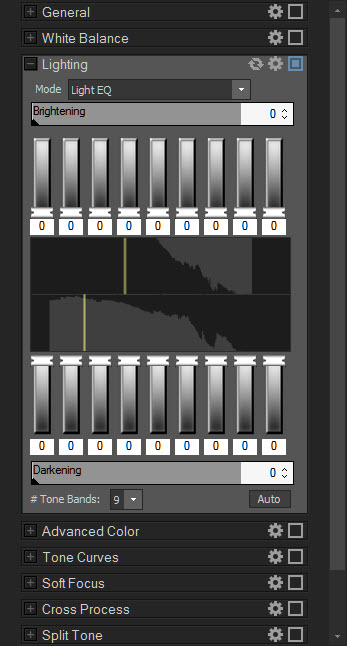
All in all, I would say this Windows only application has had a serious upgrade in functionality. ACDSee Ultimate 9, still has some obvious gaps in what I think I need in an ideal photo tool, but on the whole, I like it very much. I like it better than Lightroom, primarily for its speed of operation, and the Light equalizer (see my previous article here). However, these, functionality enhancements really seal the deal, in my mind. Of the new functions, I think I will use the adjustment layers, the Snapshot functions, and the Photoshop Plug-ins feature the most. But the exciting thing is, I don't know with absolute certainty! One of the other new tools might surprise me.